Brush Cleaning Tips
Yeah so this is weird
Ok so this is getting a little strange. I keep getting these calls for striping a parking lot. This time I received a call for Arrow Parking Lot Striping Houston. I must be showing up somewhere for searches about parking lots. I know my blog is all about painting, but there is a difference in painting a house and painting a parking lot. Lol I just have to chuckle.
So with that out of the way, let me give you a few tips on how to clean your brushes after you have been painting on your house…not your parking lot.
 Paint brushes are expensive, so keeping them clean is a must unless you are made of money. The cleanup will depend on the types of paint you have been using. In this post we will be talking about water based paints, or you may see it referred to as a latex paint. Look for other articles on how to clean your brushes after painting with other types of paint
Tip #1
Everyone will always have a different style and way to clean a brush so in my honest opinion take all the tips you find, use the best ones and be glad there is no right or wrong way to get your brush cleaned. Really as long as you get it clean you are good. Your brushes are expensive, so keeping them clean is a must unless you are made of money.
Tip #2
If you are cleaning up after using water based paints the cleanup is very easy. All you need is a little soap and a stiff cleaning brush.
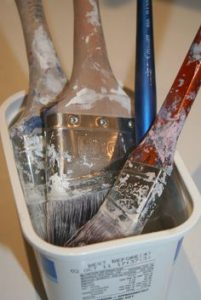
- Try to get as much paint as you can out of the paint brush by wiping the bristles along the side of the can.
- Then use warm water to rinse away the majority of the paint by rubbing the bristles along the floor of the sink.
- Next hold the paint brush bristles under the flowing water squeezing off and on, until the paint pigment disappears.
- Now put some soap in the palm of your hand, and start to work the soap into the bristles by acting like you are painting the palm of your hand. Your paint brush should be full of soap. Rinse out the soap from the brush and repeat this process if necessary. It will depend on how well you removed the pain in the beginning as to how long this process may take.
- Now that the paint has been removed from the brush, shake out all of the water from the brush.
- Finish cleaning the bristles and the farrow with a stiff brush. Shake the water out of the brush again.
- Next you need to use the cardboard protector that came with the brush and put it back on the brush for storage. If you no longer have the cardboard protector, simply wrap the brush in a stiff paper and use a rubber band to secure it in place.
Tip #3
This is somewhat of a carryover from the last step in Tip #2, but and has more to do with the storage of your brushes rather than the cleaning, but the storage of your brushes is very important after cleaning your brush. I typically like to hang my brushes bristle side down for a while to let any excess water drip out and not sit at the base of the brush. This will help prolong the life of the brush after use. Be sure to place an old towel or pail under the brush to catch any water that may drip out. Once you are satisfied that the brush is moisture free, then I would wrap it in the cardboard protector for storage.
I hope these tips have been helpful. Feel free to contact us with any questions or comments.
As I mentioned above there are multiple different ways to clean your brushes, and everyone has a preference. Here is a video of a slightly different way to clean your brushes. Pick the one you like best and go with it.
